How to Choose the Best Light Eyeball for Your Project?

Choosing the best Light Eyeball for a project is about more than selecting a fixture that looks right. The ceiling, room size, lighting purpose, and existing wiring all affect the result. A narrow beam can highlight artwork or a textured wall, while a wider beam may suit general room lighting. The difference can be striking. Before comparing styles, note the ceiling depth and measure the available cutout. A fixture that does not fit can turn a simple upgrade into extra work.

Brightness and color temperature also deserve attention. A warm tone may feel comfortable in a bedroom, while a more neutral tone can help in a kitchen or work area. Check the product’s lumen output, beam angle, dimming compatibility, and rated use. These details matter. Do not assume that every dimmer works with every LED fixture; confirm compatibility in the manufacturer’s specifications. For bathrooms or other humid spaces, verify that the fixture is rated for the intended location.

Appearance still counts. Trim color, adjustability, and glare control can change how the finished ceiling feels. Yet it is easy to overvalue a sleek photo and overlook practical fit. That is a useful pause. Compare the fixture’s dimensions with the project conditions, and ask a qualified electrician about wiring or installation concerns when needed. A careful choice balances light quality, fit, and reliable specifications—not just the look of the product.
How to Choose the Best Light Eyeball for Your Project?

Identify Light Eyeball Types, Mounting Methods, and Typical Beam Angles

How to Choose the Best Light Eyeball for Your Project?

Identify Light Eyeball Types, Mounting Methods, and Typical Beam Angles

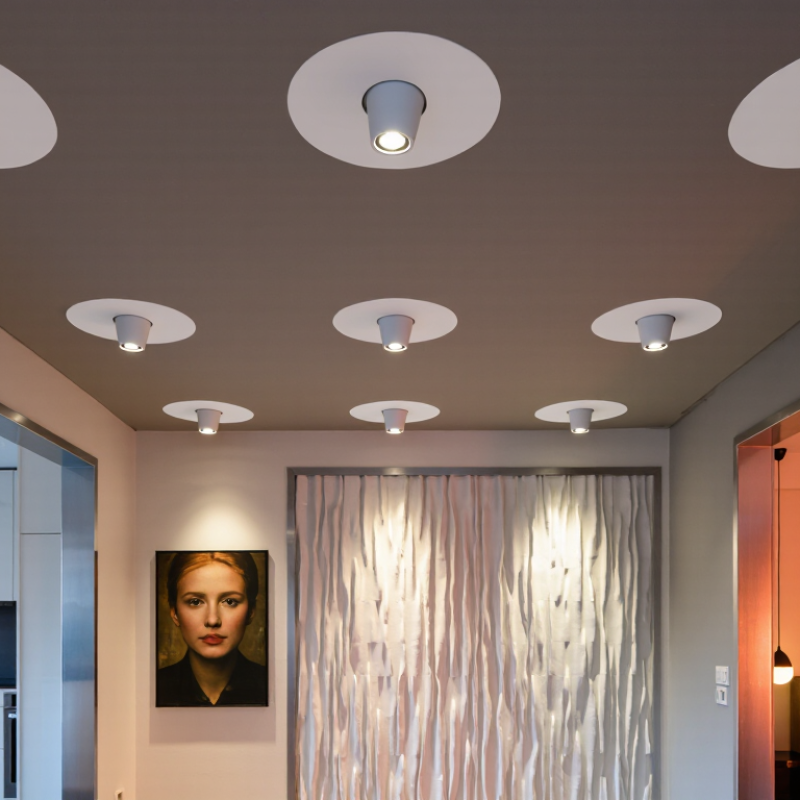
Light eyeballs are adjustable directional lights, often used in kitchens, hallways, and display areas. Fixed recessed models keep light aimed straight down; adjustable or gimbal models tilt toward a wall, artwork, or work surface. Surface-mounted versions suit shallow ceilings, while recessed fittings need a compatible ceiling cutout and enough space above the plaster. Track-mounted heads offer easier repositioning, but may look too prominent in a quiet residential ceiling. Check the cutout, ceiling depth, and adjustment range before choosing.

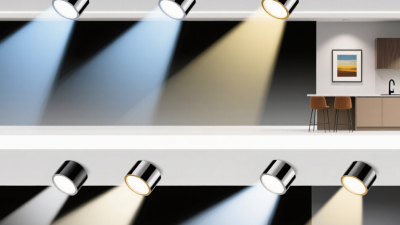
Beam angle changes how the room feels. A narrow 15–25-degree beam creates a bright pool on a picture or countertop. Medium beams around 25–40 degrees work for accent lighting, while wider beams above 40 degrees spread light across larger surfaces. These ranges are practical guides, not universal categories; compare photometric files and beam-angle definitions before ordering. The U.S. Department of Energy’s 2020 U.S. Lighting Market Characterization reported that LEDs made up 48% of installed lighting stock. That shift makes efficient LED eyeballs common, but efficiency alone cannot prevent glare or uneven patches.

Stand near the planned target and imagine the beam hitting it from the actual ceiling height. A glossy tile backsplash can throw a sharp reflection, even when the fitting looks discreet in a sample room. IES LM-79 testing provides measured photometric and electrical data for solid-state lighting products; request those results when beam shape matters. One detail is easy to overlook: tilting an eyeball can move its brightest spot away from the center of the beam. Check the real layout, not just the catalogue diagram.

Compare Light Output in Lumens and Efficacy in lm/W

Choosing a light eyeball starts with the light reaching the task, not the largest number on the package. Lumens describe total visible light output. A 900-lumen fitting may suit a small reading nook, while a larger room may need several fixtures to avoid dark patches. Check whether the stated figure refers to the lamp or the complete fitting; those values can differ.

Efficacy, measured in lumens per watt (lm/W), shows how efficiently electrical power becomes light. Divide lumens by watts to compare similar products: 800 lumens at 8 watts equals 100 lm/W. Higher efficacy can reduce energy use for the same output, but it does not guarantee a better result.

Beam angle matters. A narrow beam can brighten a countertop while leaving nearby walls dim. Numbers can mislead. I have seen the figures look convincing, then the room feel oddly harsh.

Compare products at the brightness you actually need, especially if the fitting will be dimmed. Verify that lumen figures describe comparable color temperatures and operating conditions. A warm setting can feel softer, though perceived brightness varies between people. Look for test data from a reliable source, and allow some margin if ceilings are high or finishes are dark. A glossy white ceiling reflects more light than a deep-colored one. Exact calculations still need checking on site.

Choose Color Quality: CRI ≥80 and CCT from 2700 K to 5000 K

For a light eyeball, check color quality before comparing brightness. A CRI of 80 or higher is a practical baseline for everyday interiors; it helps skin, wood, and paint look less dull under the beam. But CRI is not the whole story. ANSI/IES TM-30-20 evaluates color fidelity on an Rf scale from 0 to 100 and also reports gamut through Rg. These measures can reveal shifts that one CRI number may miss. For a kitchen or workbench, inspect actual samples under the light if possible. White tile can look clean while a red label turns strangely muted.

Tips: Choose 2700–3000 K for a warmer, relaxed feel, or 3500–5000 K when you want a cooler, more alert-looking workspace. These are design tendencies, not guarantees; dimming and surrounding finishes affect perception. Keep adjacent eyeballs close in CCT to avoid visible patches across a ceiling. Small differences matter.

Check the product’s published CRI and CCT, not just its packaging photo. ENERGY STAR lamp criteria use CRI 80 as a minimum for applicable products, while TM-30 offers a more detailed color picture. For a living area, 2700–3000 K often feels comfortable; for detailed task lighting, 4000–5000 K can look clearer. I still wouldn’t choose by numbers alone. Test the beam on the actual surface, because even a good specification can disappoint in a glossy or strongly colored room.

Match Beam Spread, Dimming, and Adjustable Tilt to the Task

How to Choose the Best Light Eyeball for Your Project?

Match the beam spread to what needs attention. A narrow beam can highlight a framed print or a textured wall, but it may create a bright spot with dark edges. A wider beam spreads light across a counter or reading area. Check the fixture’s beam angle and ceiling height; the same fitting can look very different in a low hallway and a tall living room. There is no universally right spread. Room finishes matter, too: pale walls reflect more light than dark paint.

Tips: Test one fitting before ordering several. Aim it at the actual surface, then check for glare from your usual standing or seated position. Small adjustments help.

Dimming makes a room more flexible, but confirm that the lamp, control, and fixture are compatible. Some combinations flicker or dim unevenly at low levels. Adjustable tilt is useful for directing light toward artwork or a work surface, though too much tilt can send light into someone’s eyes. A common mistake is choosing for the display alone and forgetting how the room is used at night. Recheck the aim after furniture is in place. The best setting may need another adjustment.

How to Choose the Best Light Eyeball for Your Project?

Match beam spread, dimming, and adjustable tilt to the task.

How to use this chart: These beam angles are practical starting points, not universal standards. Narrower beams suit focused accent lighting; wider beams cover broader areas. Consider ceiling height and fixture spacing, check that the driver and dimmer are compatible, and choose enough adjustable tilt to aim the light where it is needed.

Check Electrical and Environmental Ratings, Including IEC 60529 IP Codes

A light eyeball must suit both the ceiling opening and the electrical supply. Check its rated voltage, wattage, and frequency against the circuit, then confirm that the driver supports your dimmer, if fitted. A mismatch can cause flicker, excess heat, or early failure. Check the cut-out size and ceiling depth, too; a fitting that nearly fits is still a poor fit.

Read the environmental rating before choosing a location. IEC 60529 defines IP codes: the first digit indicates protection from solid objects, while the second relates to water ingress.

For example, IP44 resists objects larger than one millimetre and water splashes under specified test conditions. Not a blanket guarantee.

Look up the exact product instructions and confirm whether the rating applies to the complete fitting or only its front face, and under which installation conditions. A bathroom ceiling, covered porch, and dry living room have different exposure risks. Dust, condensation, and cleaning spray can matter as much as direct splashes.

If the documentation is vague, pause and ask a qualified installer to check suitability against the site conditions and applicable requirements. I have seen projects overlook the ceiling cavity; it is an easy detail to miss.